Acend

Tips

Guide: How to set up conversion tracking in Google Ads as a tradesman

If you’re a tradesman spending money on Google Ads but don’t know where your leads are coming from, you’re wasting a lot of money. Are you getting leads from customers searching for “Electrician in Odense” or “Electrician near me”?
To make sure your ad dollars are being spent wisely, you need to set up Google Ads conversion tracking. The easiest way to do this is via Google Tag Manager (GTM) – without messing with your website code.
In this guide, we’ll show you step-by-step how to track important leads like form fills, calls and email clicks, so you can see exactly which ads are converting customers.

1. What is a conversion for a craftsman?

A conversion is an action that can lead to a new customer. For example:

  • A customer fills out your contact form to get a quote
  • A customer calls you directly from your ad
  • A customer clicks on your phone number on your website

2. How to create conversions in Google Ads

  1. Go to Google Ads → Click on “Tools and Settings” (the wrench icon).
  2. Under “Measurement”, select “Conversions”.
  3. Click on “+ New Conversion Action”.
  4. Choose what you want to track:
  5. Website (if you want to measure contact forms or button clicks)
  6. Phone calls (if you want to track calls directly from the ad)
  7. Import (if you use Google Analytics to track visitors)
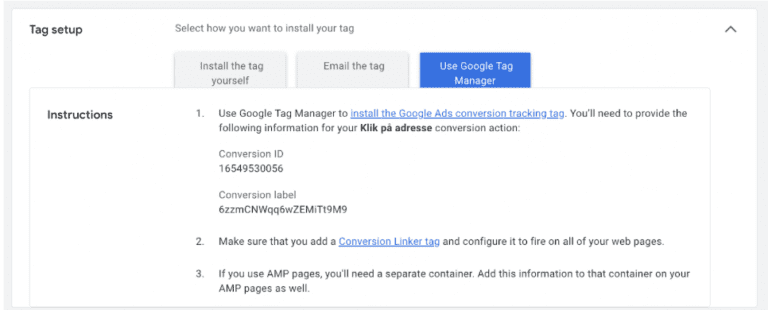
  8. Select Google Tag Manager to set up your conversion action.
  9. Copy the Conversion ID and Conversion Label – you’ll need them in GTM.
Konverteringshandling

3. Setting up tracking through Google Tag Manager

We use Google Tag Manager to set up our conversion tracking because we want to avoid having to mess with the code on our website. Plus, it makes even a layman in coding feel like a real Steve Jobs in an hour.

Setting up your Tag

  1.  Log in to Google Tag Manager → at tagmanager.google.com.
  2.  Click Tags in the left menu and select New.
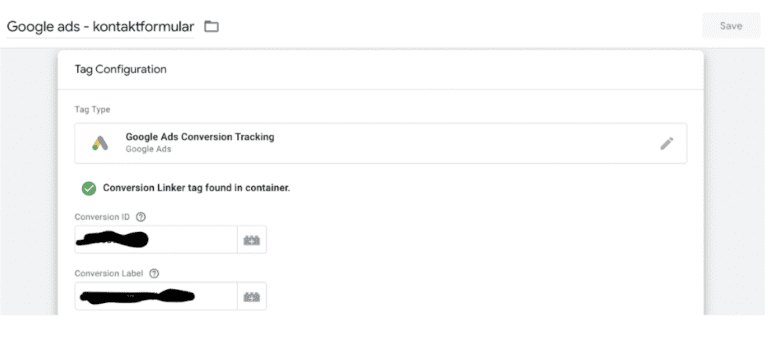
  3.  Click Tag Configuration and select Google Ads Conversion Tracking.
  4.  Insert the Conversion ID and Conversion Label from Google Ads.
  5.  Under Triggering, choose how to enable tracking – see next step.


Setting up triggers


The trigger is the most important setting, as this is what defines when the small piece of code we insert from Google Ads should be displayed. So that Google Ads can notify that users have made the desired interaction with the website.
Below I have reviewed the two most important triggers on the website; click on phone call & filling out the contact form.

Trigger for phone number

Many craftsmen receive inquiries via phone, so it is important to track these calls.

  1. Go to Triggers and click New.
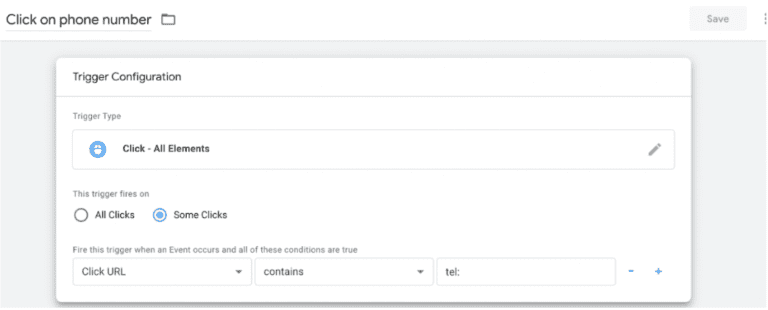
  2. Select Click – some links as the trigger.
  3. Set the condition to:
    Click URL contains “tel:” (for phone calls)
  4. Click URL contains “mailto:” (for emails)
  5. Add this trigger to your conversion tag.

Contact Form Trigger
If you want to track inquiries via a contact form, you can choose between two methods. The Thank You Page Method or the Form Submission Method.
The difference between these two is that if you have a contact form that sends the customer to a “Thank You for Your Inquiry” page after submission, we can track that page via the Thank You Page Method. If not, we can use the Form Submission Method.

Thank You Page Method

You will need to insert a tracking code on your website:

  1. Go to Triggers in GTM and click New.
  2. Select Page View as the trigger.
  3. Set the condition: Page URL contains “thank you” (or whatever is appropriate for your thank you page).
  4. Save the trigger and add it to your conversion tag.

Form Submission Method.

  1. Go to Triggers in GTM and click New.
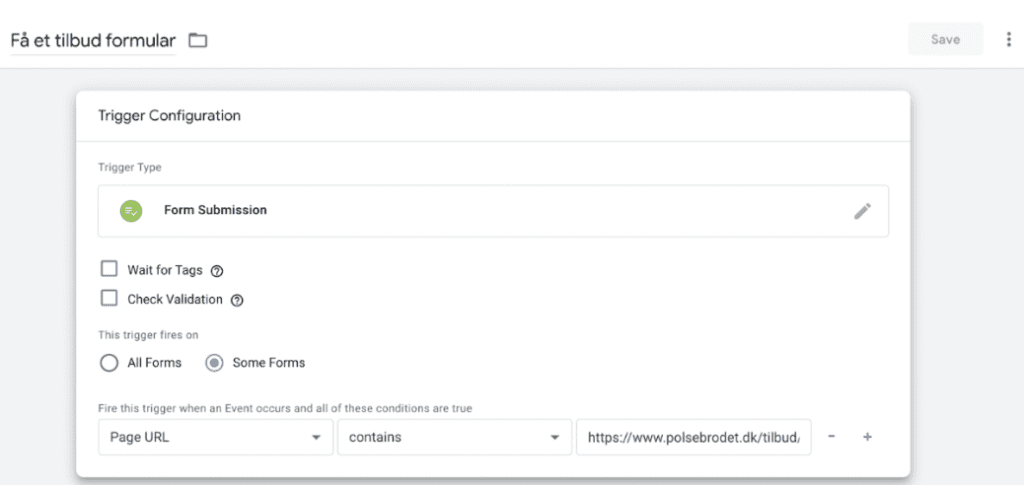
  2. Select Form Submission as the trigger.
  3. Set the condition: Page URL contains “offer” (or whatever is appropriate for your offer page).
  4. Save the trigger and add it to your conversion tag.

4. Publish your changes to Google Tag Manager

Once your tracking is set up, you need to enable it in Google Tag Manager:
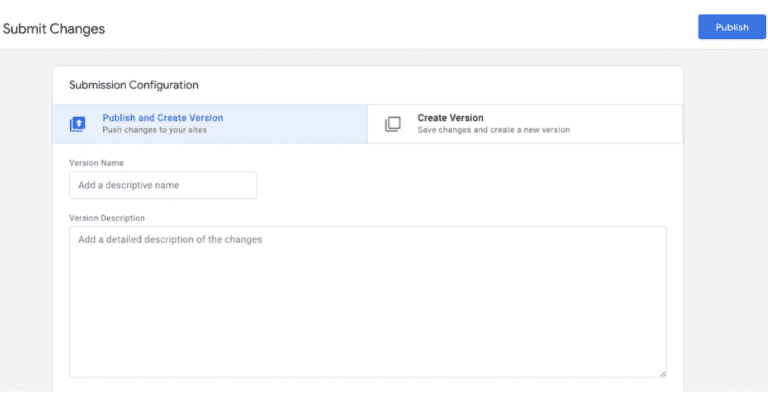
  1. Click Submit in the top right corner of GTM.
  2. Skip or Give the version a name (I never give it a nickname).
  3. Click Publish.

5. Test if your tracking is working

With Google Tag Manager, you can check if your tags are working, through a feature called Preview Mode. It lets you see if your tags are activated correctly. Here’s how to use it:
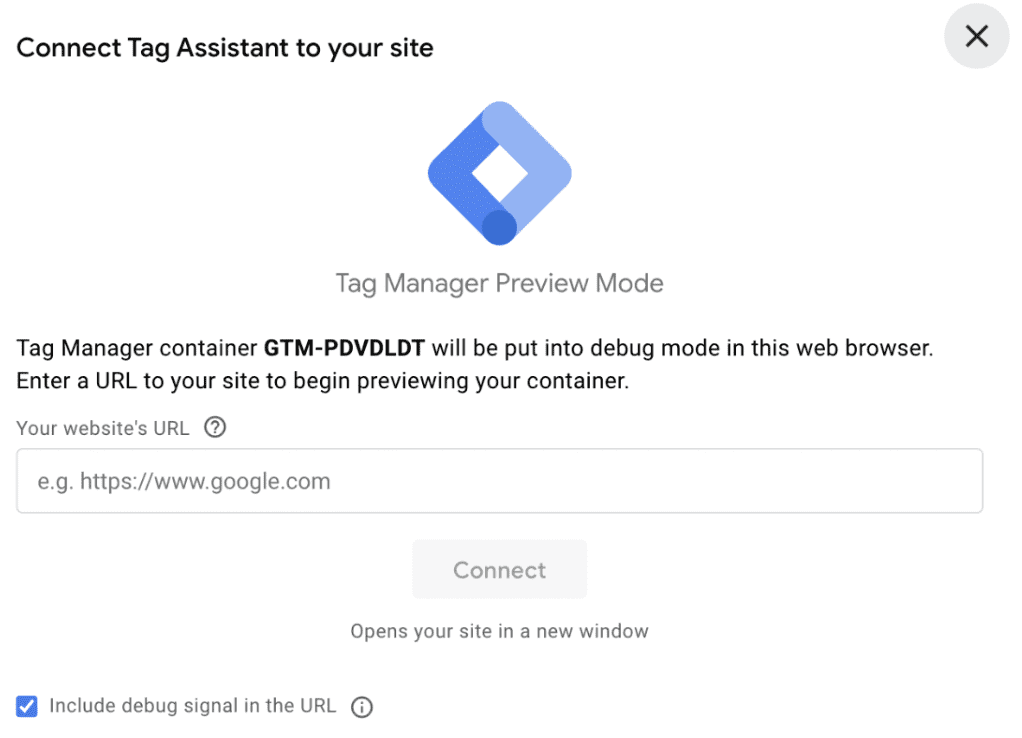
  1.  Open Google Tag Manager, and click Preview in the top right.
  2.  Enter your website URL, and click Connect.
Forbind Tag Manager til din side

3. Your website will now open in a new tab, and the GTM Debugger window will appear in the original tab.
4. Perform the action that will trigger your conversion (e.g. fill out and submit a form).
5. In the GTM Debugger window, you can now see if your tag fired under Tags Fired.
✅ If your tag appears under “Tags Fired”, your tracking is working!
❌ If your tag appears under “Tags Not Fired”, there is an error in the setup.

Do you want more organic traffic?

We are happy to look into your case. Contact us if you want to increase your online presence with SEO.

Table of contents